Thursday, December 28, 2017

Fire glass samples to original art


My girlfriend Karen found a salesmen's sample kit of fireplace glass at a local thrift shop and shared it with me not really knowing what she was going to do with it.

It's difficult to explain how my imagination works but she gifted me with whatever colors I wanted and I chose varying shades of blues not certain at the time what I was going to create with the bits of jagged glass bits. 


Here is the finished artwork created with them.


After putting them in a tumbler to soften all the edges

I laid them out from dark to light on a heavy craft paper and gave

 myself margins to work within according to the double matting 

I purchased with a white shadow box frame.


Then meticulously glued each one down with E6000 glue

and let dry overnight before putting the frame together. 


I'm pleased with how it came out and love that it resembles the sea!

Thursday, December 21, 2017

Seashell ceramic tree for holiday decorating


My latest clay creation completed just in time to decorate with.

Shown here with a collection of my previous concoctions

on my cocktail table to add a little holiday cheer!


and a snap of it before firing as it was still wet clay and


just out of firing showing it with the stand I made to accompany it.


Merry everything and happy always!

.

Wednesday, November 22, 2017

Appliquéd vest


My latest creative venture is using a discontinued drapery swatch 

with fabulous embroidery to embellish a simple vest.


I especially like the layout on the back!


I carefully cut out all the beautiful embroidery 


and laid it out on the vest

then hand stitched it in place before sewing all the pieces down.


A little creative fun at the cottage studio today.

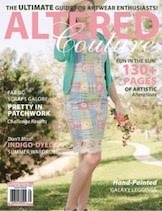
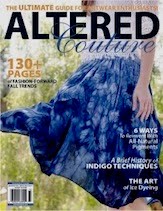
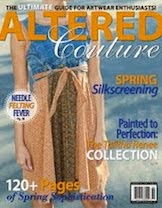
Grateful to have it featured in the latest issue of 

Altered Couture Magazine.


Friday, November 10, 2017

Sparkle and shine!


I got together with girlfriends last week

for some creative fun and jewelry making.


I had this wonderful sparkly crystal necklace with me 

and decided that instead of repairing the vintage crystal lovely

I would pull off a few of the beads 

and create a completely new look in my favorite color scheme.


I'm pleased how it has a whole new look with the vintage

 baubles and the display with my ceramic creations!


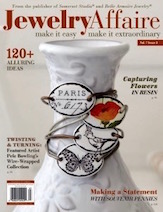
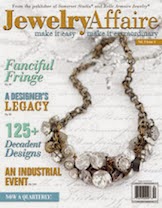
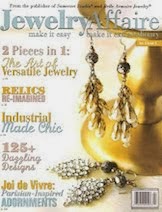
Thrilled to have it shared in Jewelry Affaire Magazine!

.

Saturday, October 28, 2017

Donating to a good cause


This creative vase/urn was created and donated 

to an auction to raise funds for the local veterans.


(the front)


I love that artists are given the opportunity to help the community with their art!


(the back)


(and when it is open)

.

And so appreciative of the high bidder.


Saturday, September 2, 2017

Mosaic vest


Remnants laid out for design ideas in my art journal.


From being in the design industry for so many years, I have 

amassed an amazing stash of discontinued upholstery and drapery 

fabrics all sorted, folded and stacked by colorway in my art studio.

While adding to and pilfering through the stack of indigo blue 

swatches I had the inspiration to create a vest to wear with blue 

jeans. My favorite fabric was a costly crewel floral fabric

 in multi-tones of blue on a cream background and I chose to use it

 to create a large shawl collar and part of the front panels. Cutting it

 out can be challenging as many of the swatches loaned to interior

 designers have a large grommet placed in the center of the sample. 

I created my own pattern out of an old cotton sheet and used a 

mannequin for fitting as I had created it with ten separate pieces so 

that I could incorporate some of the smaller swatches of fabrics into

 it. I selected a solid cotton blue to trim the collar with, creating a

 half inch border around the edge to set it apart from all the other 

fabrics that were chosen. I selected a two-tone blue lattice effect with a cream 

background for the upper back and found a fun border fabric with

 large indigo blue X's on it for creating a wide waist panel on the back

 and a found a heavy cotton with uneven stripes for the lower 

portion and intentionally left the hem with the unraveled selvage

 edge. I chose to put pleats in it and sewed the tops down for a more 

flattering look below the waist.

Dark colors on the side panels always create a slimmer profile so I


cut up an old Levis jackets' sleeves and used them with the existing

 slit opening at the bottom for a better fit and then cut out the two 

pockets for the lower half of the front panels and found some cool 

vintage buttons to replace the ones that were missing. I attached 

them to the top portion at an angle just for design fun. I chose blue

striped pillow ticking and cut it on the bias to finish the armholes

and inside the collar. 


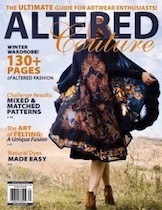
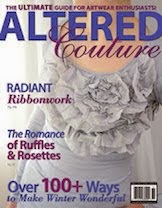
Grateful to have it included in the latest 

Altered Couture Magazine on newsstands now!


.

Saturday, August 19, 2017

Let's get organized!


I've always had a weakness for vintage laces and trims

and pretty much most anything romantic.

Over the years I have amassed a fun collection that I treasure 

and am always looking for the perfect pieces for embellishing.


While digging through baggies and boxes 

looking for a specific lovely I came across this bamboo box

that was meant for the kitchen drawer and decided to use it

as a better way to organize the vintage treasures.


I love how that worked out!

 I can even add a few more and store them stacked 

or hanging on a wall.

.

Saturday, June 3, 2017

Layered lace T-shirt


I came across the cream-colored Free People long sleeved t-shirt with the lace inserts in the sleeves and bodice at my favorite T.J. Maxx store. I am always drawn to the Free People clothing line, and I couldn't pass up this cute top at such a great price with all the detail work. Unfortunately, I didn't try it on until I arrived back at the cottage. I have to say I was not thrilled with the length. It seemed awkward, it was not short enough to show off a fit midriff and was not a flattering length, but I liked the design and color, so I went into my overflowing art studio and began pulling out and digging through my stash of unusual and mostly vintage laces, trims, and doilies. There were several potential finds set aside and then to my delight I finally discovered in the pile on the floor in front of me the perfect cream colored sheer embroidered dresser scarf from the 50's! 

I centered and laid the dresser scarf next to the bottom hem of the new t-shirt and chose to cut out of the center of the scarf a slice just an inch and a half wider than the width of the t-shirt.
Then I cut that piece in two but not in half, that would be too boring for me. I chose to make the front panel considerably shorter than the back so I cut approximately one-third the length for the front, and the longer piece was for the back. I liked that the hem on each was already finished in a darling scallop design, so all I had to do was turn over the side seams twice and do a quick straight stitch down the sides, and then I attached the two pieces to the front and back of the t-shirt with a simple zig-zag stitch. I left the sides slits open for ease and fit. 
Originally I was going to use the two scalloped end pieces of the scarf on the bottom of the sleeves folded in a french cuff design and attached to each sleeve  but changed my mind as the length of the sleeves was already very long and I have a tendency to shove up my sleeves when wearing little t-shirts while creating, especially in clay one of my favorite mediums.

Suggestions,

When shopping or going through your closet to select a top to embellish, keep in mind that a cream-colored t-shirt is going to be easier to find a matching lace for embellishing it, rather than a colored one unless the colored one has white or cream lace inserts already.

Thrift stores and Etsy are both good places to find vintage laces and a scalloped edge one like the one used here would be best.

It's always a good idea to launder your t-shirt and the lace you will be using before cutting and sewing them together.

What you will need

a cute t-shirt

a lace dresser scarf or doily

thread to match the color of the t-shirt

straight pins

sewing needle

scissors

iron


Instructions

Place the lace scarf along the edge of the hem of the t-shirt and cut approximately 1 1/2'' wider on each side than the t-shirt width.

Carefully fold 1/2'' and iron the sides over twice and then stitch it down evenly along the outside edges. 

Then attach the shorter rectangle of lace to the front of the t-shirt by hand or with a zig-zag stitch with your machine.
Then attach the longer rectangle to the back of the t-shirt.


A photo included as a visual for cutting lace scarf.


Grateful to have it included in the latest issue of 

Altered Couture Magazine!

.


Saturday, May 20, 2017

Latte for two, please!


This pair of lovelies came about as a way of teaching a dear woman who has always admired my ceramic designs and didn't believe she could be a creative artist herself, just how super easy-peasy it was to create a sweet little rose shape using an old t-shirt ripped and dipped in clay slip.
Of course, being me, I felt the need to add to the embellishing of the cup shape with a snippet of delicate cotton lace and a tiny sculpted leaf. The lesson took all of 15 minutes and was a big smiling success!

I begin with creating the basic cup shape knowing I would need it to have a base wide enough to place the vintage lace and tiny t-shirt flower with a leaf so that each will all attach easily and won't slip off while it is still wet clay, that way it all becomes one when it dries completely.
Then I cut the snippet of lace to the perfect size to fit the base without overlapping the ends and then dip it in slip and manipulate the clay throughout the lace and attach it carefully to the base matching up the two ends and tucking the top edge of lace in carefully along the base of the cup.
I've created the flowers on each of the vases using on old ripped cotton t-shirt snippet approximately 1 inch wide by 5 inches long and have also dipped it in slip and have simply twirled it around the tip of my forefinger and dropped it in place on the base of the mug.  The little leaf was created by hand with a small piece of clay rolled flat and using craft scissors to cut a leaf shape with zigzag along the edges of the clay then with a dull pencil pulled a line down the center  of the leaf and carefully attached it to the classic latte cup shape and tucked into the side of the flower.
It is touched up and dried completely before putting it into a kiln firing at 1200 degrees. The fabrics burn out at this temperature but you are left with the clay design that coated them and when it comes out of its first firing you can then chose your favorite colors of glazes to be added to make it beautiful and waterproof, and it is fired a final time.


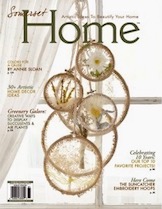
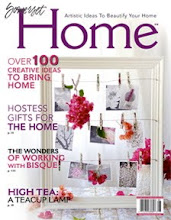
Thrilled to share the creative fun in Somerset Home Magazine!

.

Friday, March 17, 2017

Sea glass inspired necklaces


Inspired by the little seaside town where I live 

and the ever-changing colors of the sky and ocean 

these tumbled glass beauties were created

 by mixing and matching a variety of natural materials

with bright, beautiful shades of blues and greens.


I wanted to create multilayered, multifaceted pieces

that can be layered or worn alone

and are perfect for that statement pop of color.

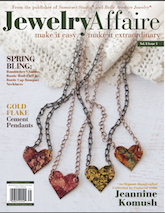
Grateful to have them included in the latest Jewelry Affaire Magazine!


.

Friday, February 17, 2017

Treasured vintage button collection


I pulled out my button box and gathered together over 50 

of my all-time favorite vintage gold toned buttons.


A wide piece of elastic was the perfect base to attach them to. 

I cut it to fit my wrist and dyed it to match.


Some of my treasured collection of vintage gold tone buttons


that have been hidden away for so long are brought out and


 all lovingly hand sewn onto a piece of wide elastic 

that I dyed to match.


I love it!   


Who says you can't have your cake and eat it too!


I couldn't seem to stop with just one!


Grateful to have it included in the latest issue of 

Jewelry Affaire!
.


.

Sunday, January 8, 2017

Fun with succulents!


My local Anthropologie hosted a little workshop on how to create 

headbands using succulents.


Bits of lace used as a base, glue guns and lots of little 

succulent bits were strewn across the tables.


Julie, from House of Sunshine, was giving us suggestions 

on how to create our pieces.


We were surrounded by beautifully displayed inspiration 

and provided with light refreshments.


 Here is my completed little number displayed as a hat band


and on a bed of greenery


and as a headband.


 And as a necklace in Somerset's Belle Armoire Jewelry!