Sunday, June 23, 2013

Coastal cool tags and embellishments


Playing with clay and seashell molds


Embellishments and cool bottle shapes

Fiskar scissors and gift tag ideas

Creating stoppers and key chains, 

drawer pulls and doodads,

bathing lotions and potions


summer fun continues at the cottage by the sea... 


Saturday, June 15, 2013

The latest dish!


... a creative new challenge for me,
working with china paints.

Many of us have our collections of china with beautiful roses 
hand painted on vintage vases and dishes. 

Being inspired by painters of the past I wanted to experiment and put my own twist on it by creating a local dish with a map of my little seaside town of Laguna Beach.


I recently had the opportunity to be inspired by some amazing pieces created by Franz A. Bischoff at the Joan Irvine Art museum.


Here is a brief history on the artist...

Franz A. Bischoff (1864-1929) began his artistic training at a craft school in Bohemia at the age of 12. He trained in ceramic decoration. In 1882, he came to the United States and worked as a painter in a ceramic factory in New York City. He moved to Pittsburgh, then to Fostoria, Ohio, and finally to Dearborn, Michigan, continuing to work as a porcelain painter.

      Bischoff became one of the foremost porcelain painters of his day and is still regarded today as the greatest American porcelain painter. His porcelain works were exhibited at the 1893 World's Columbian Exposition in Chicago and at the 1904 Louisiana Purchase Exposition in St. Louis. He founded the Bischoff School of Ceramic Art in Detroit and in New York City. Additionally, he formulated and manufactured many of his own colors, participated in exhibitions and won several awards, earning a reputation as "King of the Rose Painters."
He first visited California in 1900, and finding the climate and scenery appealing, made plans to move his family, arriving in Pasadena in 1906. In 1908, he built a studio-home along the Arroyo Seco in South Pasadena, which included a gallery, ceramic workshop, and painting studio. In 1912, he took an extended tour of Europe where he studied the works of the Old Masters and the Impressionists.
    On his return to California, Bischoff turned to landscape painting and gradually abandoned porcelain decoration. Through the 1920s, he painted the coastal areas of Monterey and Laguna Beach, the Sierra Nevada Mountains, and the desert near Palm Springs. Some of his most charming works were painted in the small central California village of Cambria. In 1928, he and his friend, the artist John Christopher Smith, traveled to Utah, where they painted in Zion National Park. He died at home, on February 5, 1929.
Bischoff exhibited with the California Art Club and the Laguna Beach Art Association. In 1924, he received the Huntington Prize, an annual award given for the most popular painting at the California Art Club exhibition.

Sunday, June 9, 2013


I miss drawing...

I've been craving a pencil and subject matter for some time now.

Late last night the muse arrived in the form of a seahorse.

So I dug through my cluttered studio and pulled out a bisque dish, 

a high fire marker and a stump

and satisfied my soul...


 In this case 


the best way to satisfy a craving 


is to give into it!


Sunday, May 26, 2013

Binders and book covers


This recipe book was being discarded and since I loved the size,

I chose to rescue it and give it a new purpose and a new cover.


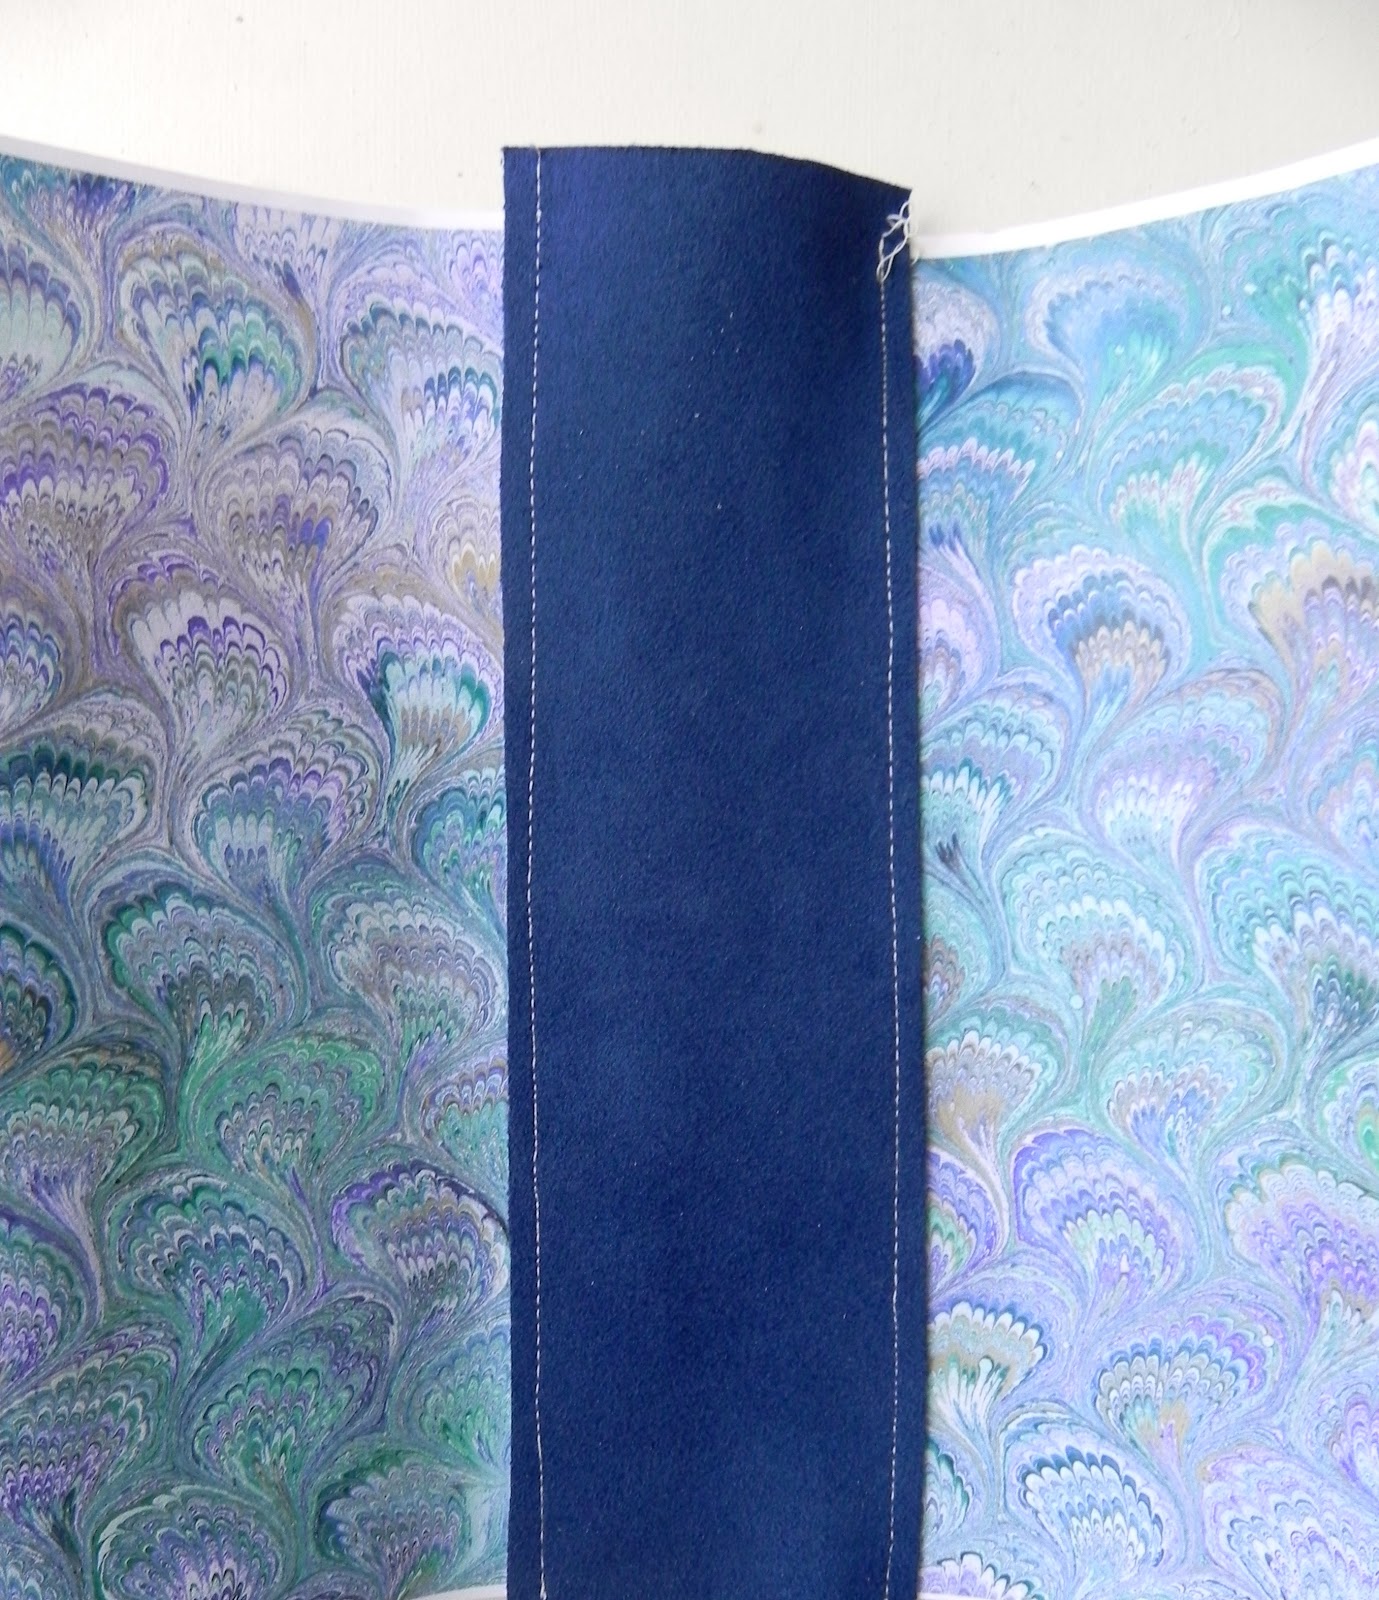
I have been experimenting with marbling paper

and that is where my head was at when I began chopping up the little binder.


I had several sheets of treasured marbled paper

that I had purchased while visiting the town and shops of Venice

and decided this was the perfect place to use and enjoy it on a regular basis.


I also had a swatch of blue suede fabric that blended beautifully

 and I sewed it down the center of the paper,


before laying out and cutting a template to fit the rescued acquisition.


Then I began gluing it all down, fold by fold,


and adding new lining to the inside covers as well.


These paper clips became clamps that were needed

 to reinforce the area where the fabric was glued down.


New filler paper was purchased,


 and I now have a new TO DO notebook to keep all the lovely thoughts

 swirling around in my mind in one beautiful place!


I ended up on a creative roll 


and continued covering objects with leftover scraps of paper 

including a fun sketching pencil!


Friday, May 17, 2013

Everything is coming up Roses


Thank you Romantic Home Magazine for including my 
yellow roses in your yearly Rose Issue.
It is such a thrill and honor!


It is a little article showing how this piece is created.


This sweet pink vase was created with the demo.


Saturday, April 27, 2013

Celebrating Spring

with a May Day Basket...


{ or ceramic wall vase }

created with cotton lace and clay.


and filled with special garden treats to surprise my neighbor.


Happy May Day!


Saturday, April 20, 2013

Decoupage Seashell Frame


I was happily surprised when my neighbor Stephanie invited me 
over to her home for an informal craft party this afternoon.

I wasn't sure what to expect, 
she takes X-rays all day long and I had no idea she was into art.


She mentioned she had picked up some acrylic paints and 
wooden frames at Michael's on sale.


So I went back to my studio and collected some of my favorite

 decorative napkins to share with the other women who were 

coming together for some creative fun.


The pretty napkins were a big hit!


It made the play date so much less intimidating to the new artists.

Decoupage was a word they had not heard before.

I shared how to pull the napkins apart and carefully rip around the 

images they wanted to use on their frames and layout the designs.

Some stamped letters and painted the background with paints, 

others left the natural frame and did a color wash on top the images.


Then I showed them how to decoupage the images in place with 

good old fashioned white glue watered down and using a paint 

brush starting in the center and working our way out to release any

 air bubbles.


They were thrilled with the results. 

 I am sorry I hadn't brought my camera to catch photos of all the creativity and fun.


I have only my example to share with you today.


Sunday, April 14, 2013

Seashore inspired mosaic tray


I began creating various sizes of ceramic tiles to use in an old 

wooden tray that I found at a thrift store.

 I chose to paint it all white. I had primer and house paint leftover 

from work around the cottage, and it worked perfectly on the 

old brown tray.


The goal was to incorporate the varying shades of Tiffany blue hues 

that I had been using on some of my latest ceramic serving pieces 

for alfresco dining at the cottage along with the color of new

 growth in the spring a lovely green that I had used to paint all the

 shutters around my historic cottage.


 I intended to use it for serving in the charming bricked in courtyard 

full of flowering plants and vines.


I added in some beautiful glass tile samples leftover 

from a sample card, some flat marbles typically used for floral

 arranging and even a few stray pearls, and vintage buttons just 

because I could!


Pieces with raised shells and embellishments I placed in the corners

 of the tray to reserve the center to be flat for serving.


I chose liquid nail to glue the pieces in place, and when it was 

completely set I used white grout following the manufacturer's 

direction to fill in all the spaces.


There are some days when it all comes together and causes your heart to sing! 

Thrilled to have it published in Somerset home!


.


Saturday, March 30, 2013

Spring greetings...


.


Happy Easter

from my garden to yours!


*

Saturday, March 16, 2013

Vintage Doilies


This idea has been spinning in my imagination for some time now.
 I knew exactly which table cloth I wanted to experiment with.
It's a small square table topper in a cream color fabric 
that I created to lay over a lush green velvet covered round table.


I pulled out a stash of vintage doilies 
and began laying them out along the edge.
You can hand stitch them in place once you have positioned them.


I'm not done yet, I need to keep adding to it.
I need to find some square and oval shapes too.
I just wanted to get the post up and share the fun.

This is a super easy DIY project 
and a great way to enjoy your favorite vintage doilies.


Here is a little tip, if you don't have enough to go all the way around,
 you can cut them in half and sew the raw edges carefully into the hem.


Happy St. Patrick's Day!


Saturday, March 2, 2013

Seashell sconce shelf


created out of clay 

with a simple shape

and lots of seashell add ons 

then a soft satin glaze

and a subtle touch of color


 close up details


...just a little fun hand building with sweet results!
.

Thursday, February 14, 2013